Appearance
Teams & Workspaces
Plan Count supports both Personal and Team workspaces. This guide covers everything you need to know about working with teams, including workspace switching, team administration, seat management, and collaboration.
Understanding Workspaces
Plan Count uses a dual-workspace model to keep personal and team work separate:
Personal
Team
| Workspace | Color Theme | Description |
|---|---|---|
| Personal | Orange | Your private projects and personal credits |
| Team | Purple | Shared team projects and team credits |
This color-coding appears throughout the app to help you quickly identify which workspace you're viewing.
Switching Workspaces
If you're a member of a team, you'll see a workspace switcher in the header navigation.
Click the dropdown to switch between workspaces
How to Switch Workspaces
- Click the workspace switcher dropdown in the header (shows your current workspace name)
- Select either Personal or your Team name
- The app will refresh to show projects from the selected workspace
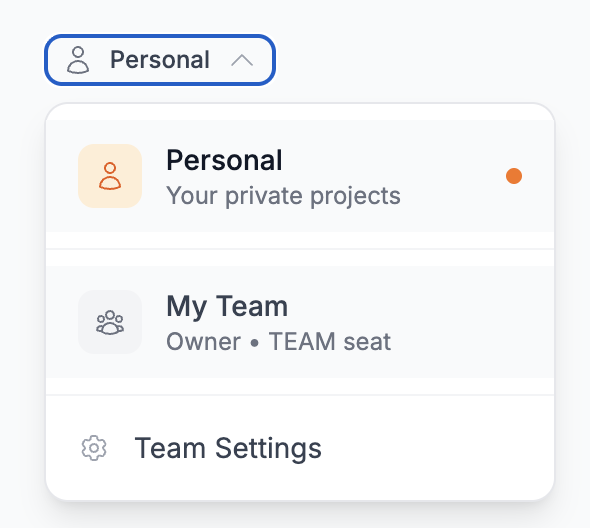
Workspace Switcher Details
The dropdown shows:
- Personal - Your private projects (orange icon)
- Team Name - Your team's shared projects (purple icon)
- Your role within the team (Owner, Admin, Editor, or Member)
- Your seat type if assigned
Note
If you're a team member but don't have a seat assigned, you can see the team in the switcher but cannot access team projects. Contact your team admin to get a seat assigned.
Workspace Behavior
- Your workspace preference is saved and remembered across sessions
- Team users with project access default to team workspace on first login
- All project operations (create, edit, delete) happen in the currently selected workspace
- Credits are deducted from the current workspace (personal credits or team credits)
Team Dashboard
The Team Dashboard is your central hub for team management. Access it by clicking Team Settings from the workspace switcher dropdown (visible to Owners and Admins only).
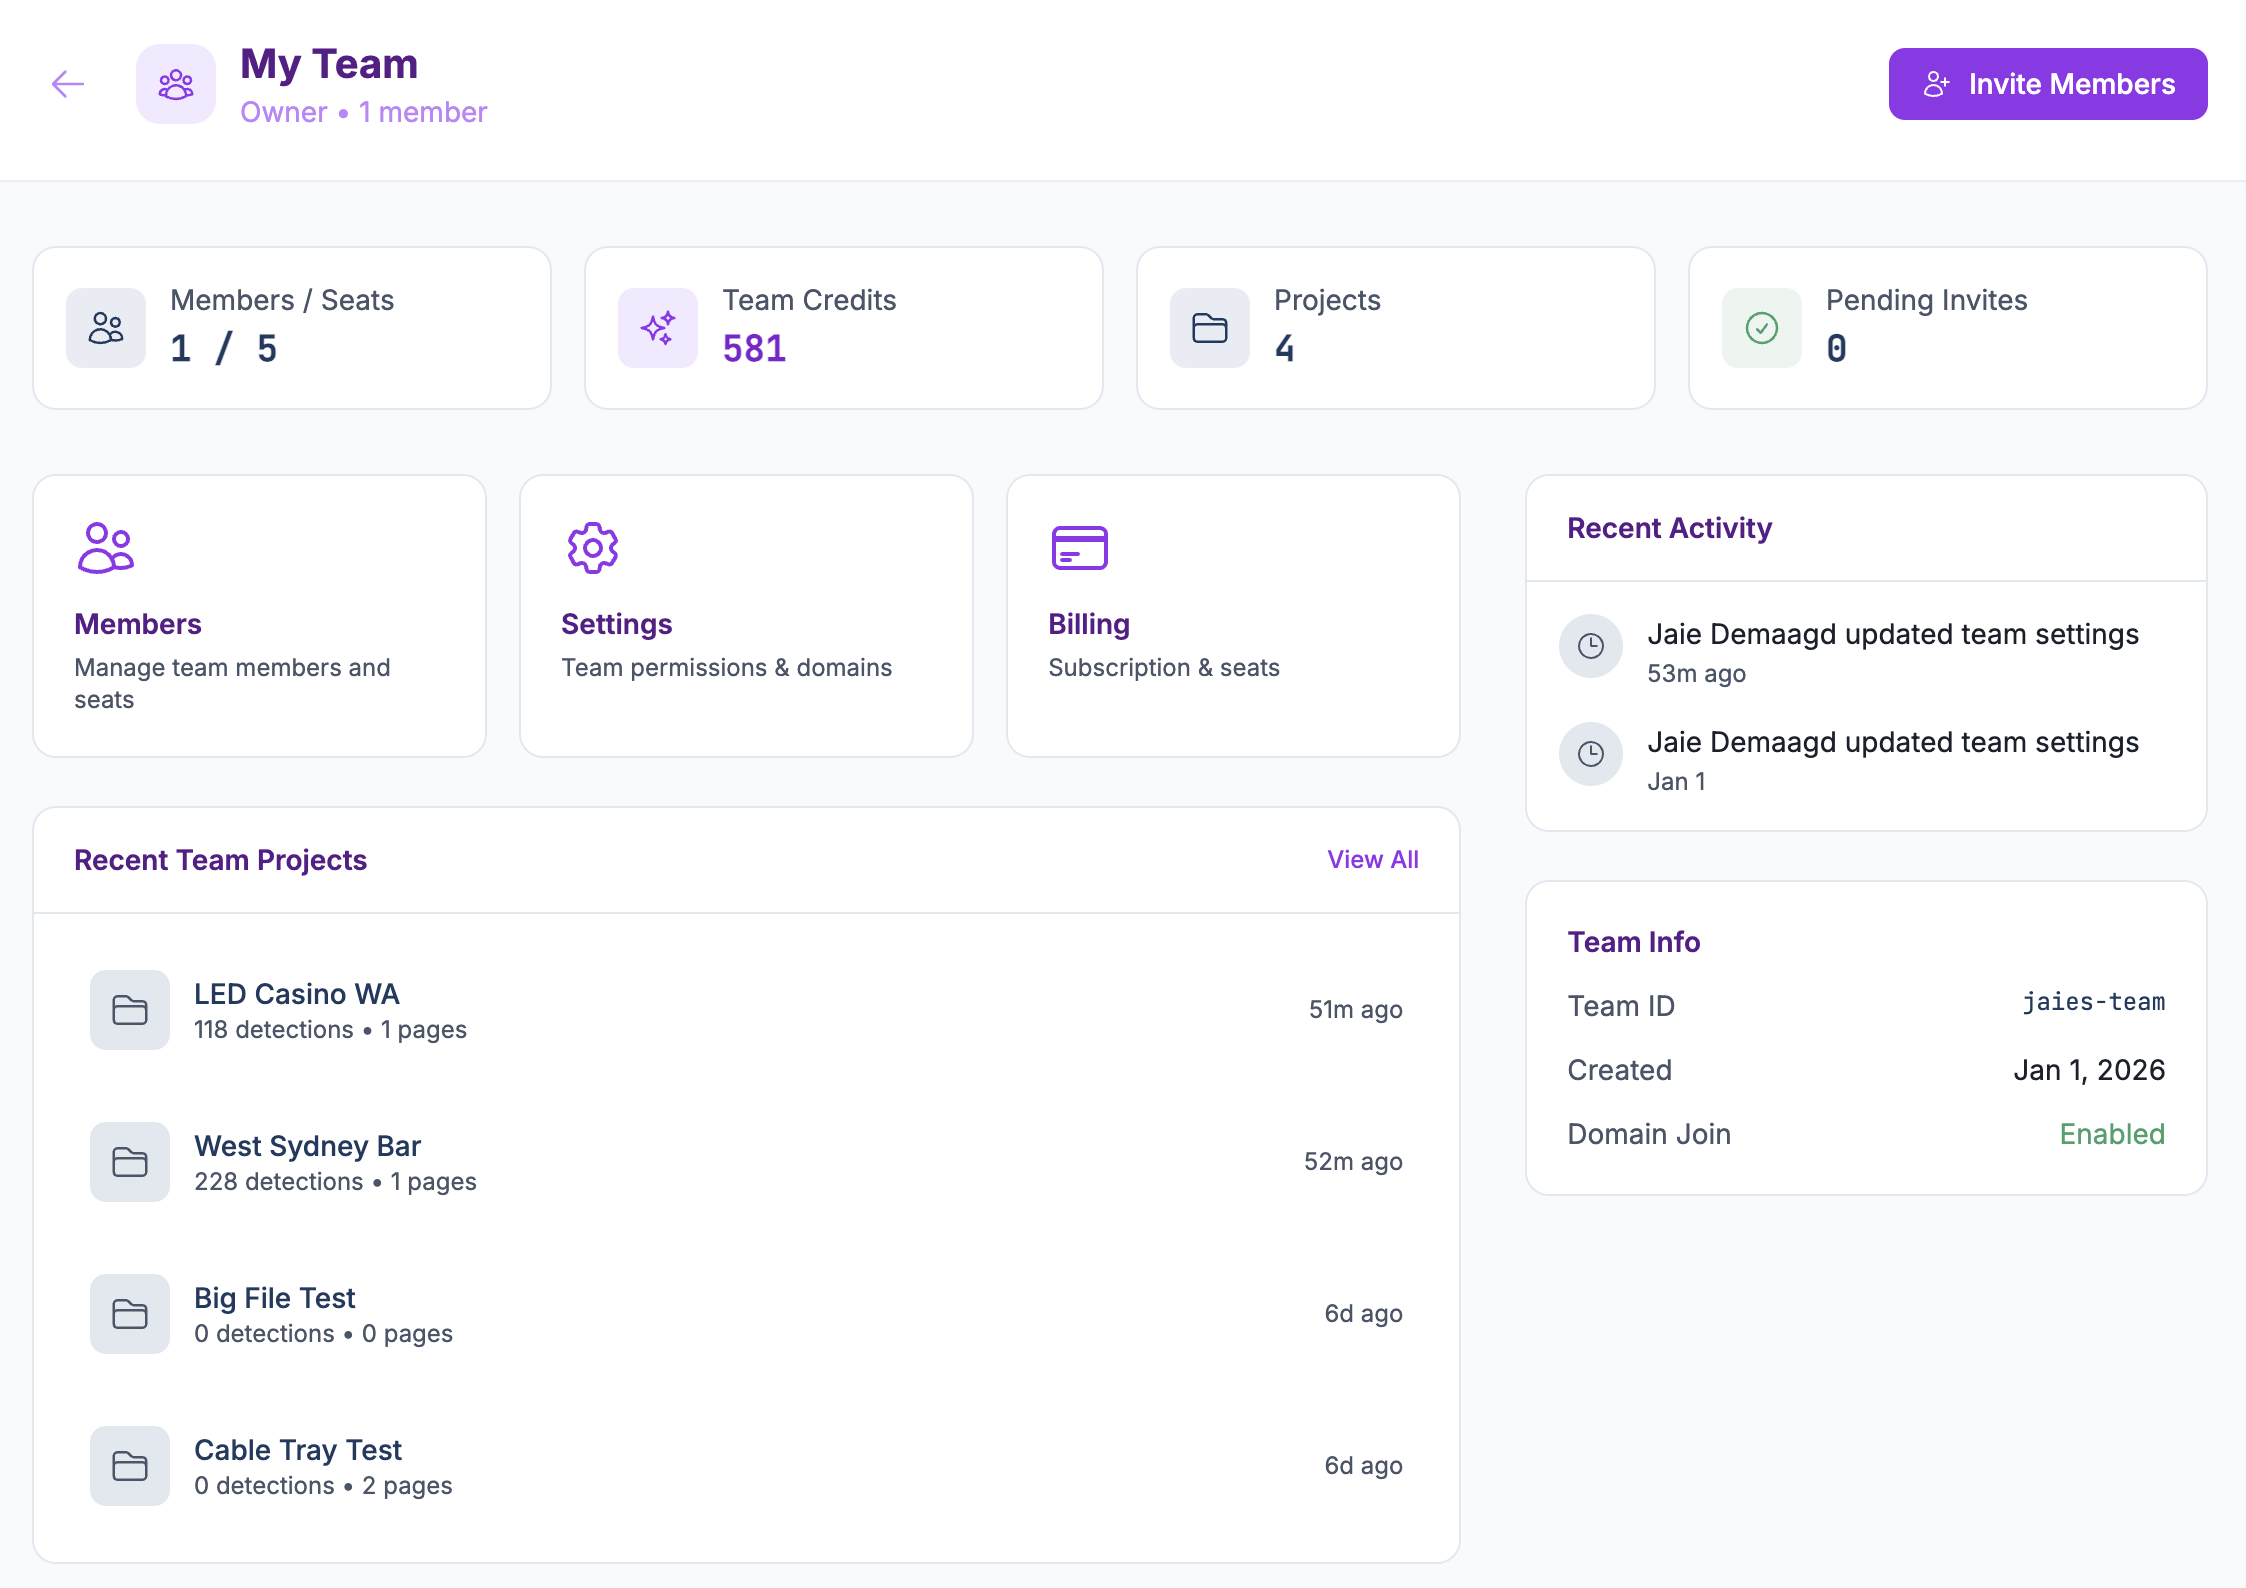
Dashboard Overview
The dashboard displays:
Quick Stats
- Members / Seats usage
- Team credit balance
- Total projects count
- Pending invitations
Management Cards (Owners/Admins only)
- Members - Manage team members and seats
- Settings - Team permissions and domains
- Billing - Subscription and seat management
Recent Team Projects
- Quick links to recently updated projects
Recent Activity
- Audit log of team actions (invites, role changes, etc.)
Team Info
- Team ID (slug)
- Creation date
- Domain join status
Managing Team Members
Navigate to Team Dashboard > Members to manage your team.
Viewing Members
Members are organized into sections:
- Awaiting Seat Assignment - Members who accepted invitations but need a seat
- Pending Join Requests - Users requesting to join via domain join
- Pending Invitations - Sent invitations awaiting acceptance
- Active Members - Members with seats who can access projects
Member Roles
| Role | Permissions |
|---|---|
| Owner | Full control - manages billing, settings, members, and can transfer ownership |
| Admin | Can manage team settings and members, assign seats |
| Editor | Can create, edit, and delete projects |
| Member | Can view and edit projects (cannot delete) |
Inviting New Members
- Click Invite Member button
- Enter the email address
- Select a role (Admin, Editor, or Member)
- Click Send Invitation
The invitee will receive an email with a link to join your team.
Changing Member Roles
- Find the member in the Active Members list
- Use the role dropdown to select a new role
- Changes save automatically
WARNING
You cannot change the Owner's role. Use Transfer Ownership in Settings if you need to change team ownership.
Removing Members
- Find the member in the member list
- Click the trash icon
- Confirm the removal
TIP
Removing a member frees up their seat, which can be reassigned to another member.
Seat Management
Seats control how many team members can actively access team projects.
Understanding Seat Types
| Seat Type | Included | Price | Credits/Month | Storage |
|---|---|---|---|---|
| TEAM | 5 seats | Included in base | Shared 600 | Shared 20 GB |
| BASIC | 0 | $19/seat/month | +50 | +1 GB |
| GROWTH | 0 | $99/seat/month | +300 | +10 GB |
How Seats Work
- Every team starts with 5 TEAM seats included in the base plan
- Team members need an assigned seat to access team projects
- Members without seats can see the team but cannot view/edit projects
- Additional seats (BASIC or GROWTH) can be purchased to expand your team
Assigning Seats
- Go to Team Dashboard > Members
- Find a member in the "Awaiting Seat Assignment" section
- Click Assign Seat to auto-assign the first available seat type
- Or use the seat dropdown on any member to choose a specific seat type
Changing Seat Assignments
- Find the member in the Active Members list
- Click their current seat badge to open the dropdown
- Select a different seat type or "Unassign Seat"
INFO
TEAM seats cannot be unassigned (they're included in the base plan). Only BASIC and GROWTH seats can be reassigned.
Purchasing Additional Seats
- Go to Team Dashboard > Billing
- In the "Add Seats" panel:
- Select BASIC ($19/mo) or GROWTH ($99/mo)
- Enter the quantity
- Click Purchase
- You'll be redirected to Stripe to complete payment
Removing Seats
- Go to Team Dashboard > Billing
- In the "Remove Seats" panel:
- Select the seat type to remove
- Enter the quantity (only unused seats can be removed)
- Click Remove Seats
- Changes take effect at your next billing cycle
Team Settings
Navigate to Team Dashboard > Settings to configure your team.
General Settings
Renaming Your Team
- Go to Team Settings
- Edit the Team Name field
- Click Save Changes
The new name will appear in the workspace switcher and throughout the app.
Domain Join
Domain Join allows users with matching email domains to request to join your team automatically.
Enabling Domain Join
- Toggle Enable Domain Join on
- Add allowed domains (e.g.,
yourcompany.com) - Configure approval settings:
- Require Approval ON: Join requests need admin approval
- Require Approval OFF: Users join automatically (use with caution)
- Click Save Changes
Adding Allowed Domains
- Enter a domain (e.g.,
company.com) - Press Enter or click the + button
- Repeat for additional domains
- Click Save Changes
WARNING
Public email domains (gmail.com, outlook.com, yahoo.com, etc.) are blocked from domain join for security reasons.
Danger Zone (Owner Only)
The owner can access these options:
- Transfer Ownership - Transfer team ownership to another admin
Team Billing
Navigate to Team Dashboard > Billing to manage your subscription.
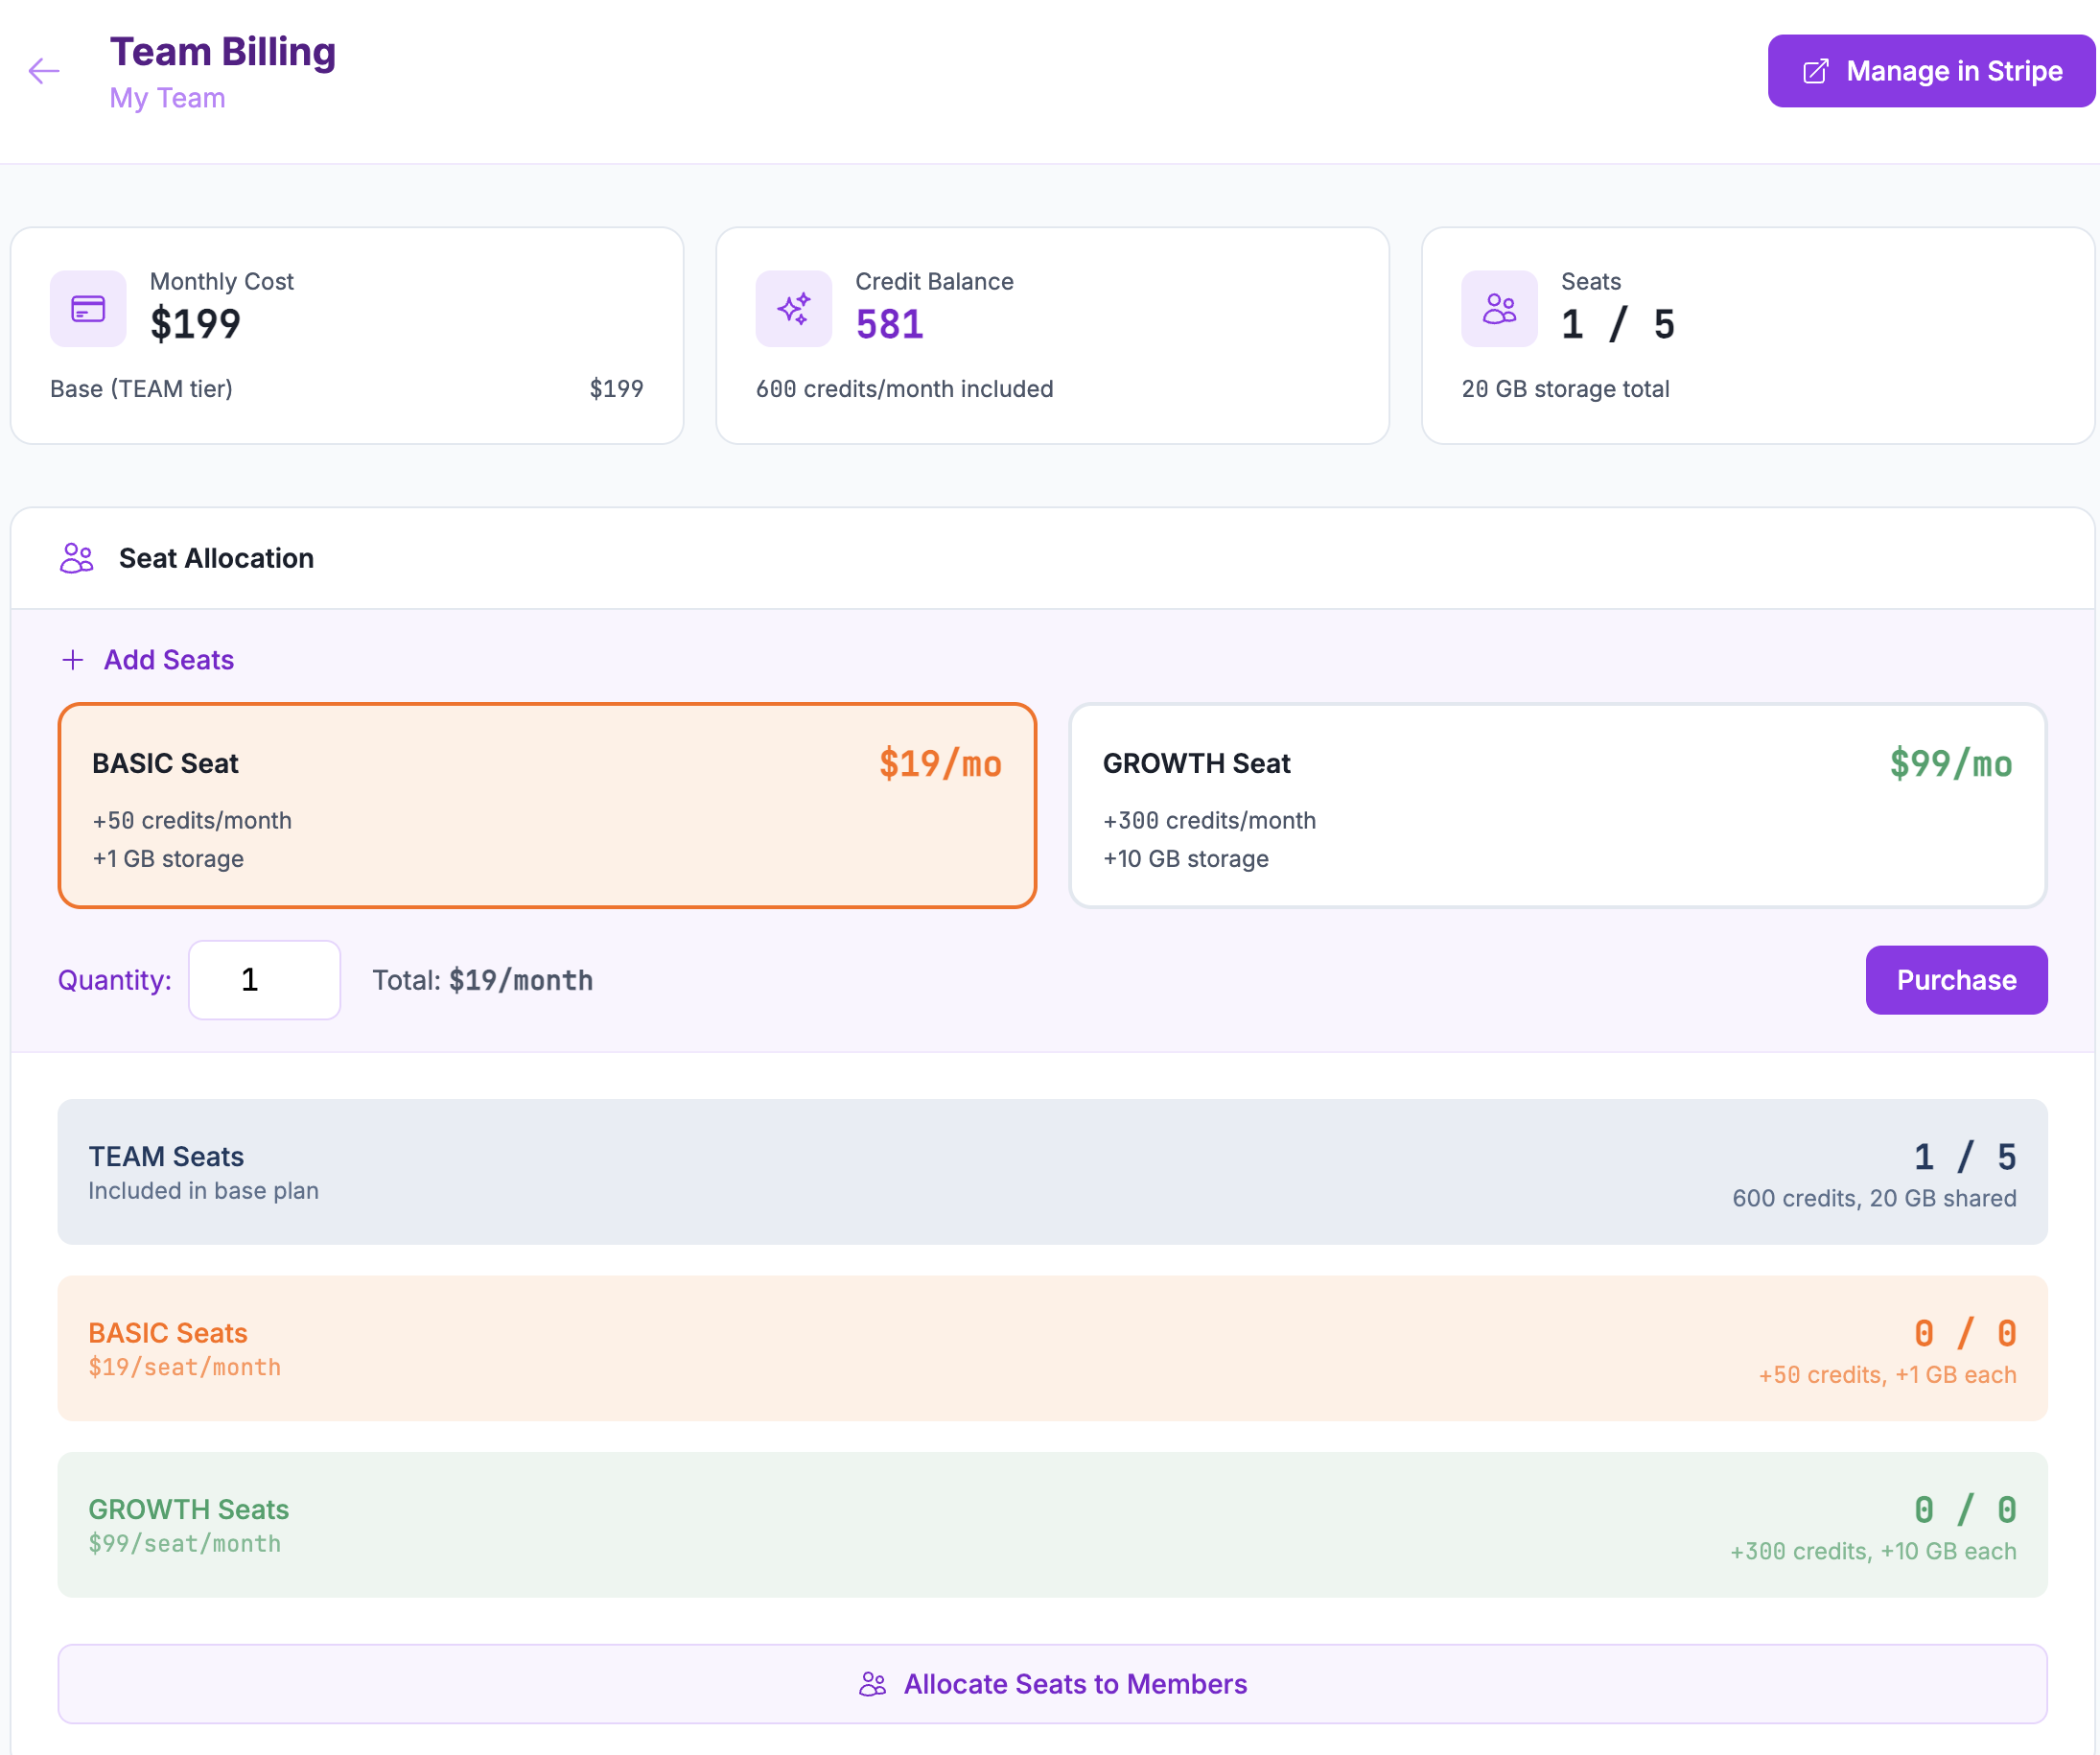
Billing Overview
The billing page shows:
- Monthly Cost - Base plan plus any additional seats
- Credit Balance - Current team credit balance
- Seats - Total seats used vs. available
- Storage - Total storage allocation
Managing Your Subscription
Click Manage in Stripe to:
- Update payment method
- View invoices
- Cancel subscription
- Update billing information
Credit History
View your team's credit transaction history, including:
- Monthly credit additions
- Export deductions
- Manual grants/revokes (by admins)
Collaborating on Projects
When working in team workspace:
Creating Team Projects
- Switch to team workspace using the workspace switcher
- Create a new project as normal
- The project is automatically owned by the team
Project Visibility
- Team workspace: All team members with seats can see all team projects
- Personal workspace: Only you can see your personal projects
Credit Usage
- Team project exports deduct from team credits
- Personal project exports deduct from personal credits
- Each workspace has its own credit balance
Best Practices for Teams
- Establish naming conventions for projects (e.g.,
[Client] - [Building] - [Phase]) - Use team workspace for client work and shared projects
- Use personal workspace for experiments or personal reference
- Assign seats strategically - GROWTH seats for heavy users, BASIC for occasional users
- Review seat allocation monthly to optimize costs
Joining a Team
Accepting an Invitation
- Check your email for a team invitation
- Click the invitation link
- Sign in or create an account (if needed)
- You'll be added to the team
INFO
After accepting an invitation, you may need to wait for an admin to assign you a seat before you can access team projects.
Requesting to Join via Domain
If a team has domain join enabled for your email domain:
- Sign up with your company email
- The app will detect a matching team
- Click Request to Join
- Wait for admin approval (if required)
Troubleshooting
"No Seat Assigned" Warning
Cause: You're a team member but don't have a seat assigned.
Solution: Contact your team admin to request a seat assignment.
Cannot Switch to Team Workspace
Cause: Either you don't have a team, or you don't have a seat assigned.
Solution:
- If you're not in a team, ask for an invitation
- If you're in a team without a seat, contact your admin
Cannot Access Team Settings
Cause: Only Owners and Admins can access team settings.
Solution: Ask your team Owner or Admin to make changes, or request role elevation if appropriate.
Domain Join Not Working
Cause: Your email domain may not be in the allowed list.
Solution: Ask your team admin to add your domain to the allowed domains list.